Tools, Craft Supplies, Books, Music

Tools, Craft Supplies, Books, Music
powered by Amazon

Monday, April 26, 2010

Tools Are For Women Too! Big Announcement!

Some of you may have been wondering where I have been the last few days.  Did you miss me?  I have been working on a pretty exciting project.  It is a brand new blog called Tools Are For Women Too!  In it will be tool reviews, DIY projects, tips, projects you can do with your kids, tutorials, and an online store.  This site will differ from most other tool sites, in that this one will be geared towards the craftswoman.  The online store won't be carrying much in the way of sledgehammers, but it will feature brand names like Cricut, Gingher, Xacto, Dremel, and Dewalt, just to name a few.

Tools Are For Women Too! also has 2 drawings going on right now for sterling silver necklaces.  You need to run over there and get the details.


 A link party is also being planned to kick things off!  I will let you know in a few days when it is.


Setting up this new site has been pretty labor intense.  I hope you will all take the time to visit it and pass the word along, now that there is a tool site, specifically designed for women.

Rory

Friday, April 23, 2010

Sterling Silver Giveaway at The Greentiques Solution

Thats right.  In honor of Mother's Day I have decided to give away a sterling silver 22" neckchain. 


It is a single strand snake chain, shown here doubled up.  I will announce the lucky winner on Mother's Day.  Rules are simple.  To Enter:

1.)  Become a follower if you haven't already.

2.)  Comment on this post and tell me what 5 tools and/or supplies you use the most in your particular area of craftwork.  Whatever it is you use, I want to hear about it.  Everything from sewing needles to table saws, and fabric to wood.  I am looking for your 5 favorite items. Please be specific.   Brand names and model numbers are not required, but helpful. 

That's it.  I just want to know what you all are using out there, so I can better zero in on what I should be carrying in my online store.  I will be drawing the winner on Mom's Day, Sunday, May 9th.  Good Luck!


 Rory

Thursday, April 22, 2010

A Guest Post Feature By Stacey From It's Fun To Craft!

That is me, Stacey.I am the crafter over at Fun to Craft.
I blog to share tutorials, crafts, sewing projects, recipes, frugal finds or tips, and host giveaways. I have two crazy kiddos and one law student for a husband who is sometimes seen around our house. (He has 3 weeks left though so we are in countdown mode!!) I get bored and craft as my creative outlet. I think it helps keep me sane! I definitely dig home decor, sewing, crocheting, hand embroidery, spray painting, hot gluing and anything else I have to do to make that project just right.
Aside from crafting, I love Diet Dr Pepper, playing the wii with my hubby, watching some reality TV, eating chips and salsa like it's going out of style, and playing games with family and friends. Some of my favorite projects I have featured on my blog are: I changed up this wooden pencil holder to add a bit more flair to my computer desk. The paper was picked out by my hubby so it was a bit more manly. I made these Luggage Tags to add a little pop of color on my luggage and to help me id my bags quicker! I whipped up this Camera Strap Cover with frills to sport my camera in style, plus it has a nice padded minky fabric for my neck!I made this Art Smock out of a vinyl tablecloth. Very cheap and a great way to keep my kiddos clean during those crazy art projects. I made this nice Book Momento for my hubby's 30th birthday filled with admiring thoughts from others. I have a LOT of fun over at Fun to Craft and would love for you to join me! I have a 'Look at me, I am SO Crafty!' Link Party every Friday. I love making new blogging friends and love to find new inspiring blogs to check out too. So come by, leave me a comment and I will come check out your blog too!! Thanks again to Rory for having me here today. It's been great!!
Host unlimited photos at slide.com for FREE!

Wednesday, April 21, 2010

Tool Review-DEWALT DC720KA Cordless Drill/Driver

For those of you who have never had the pleasure a quality cordless drill to do your DIY projects, you are in for a real treat if you start out with one of these.


This cordless drill from Dewalt boasts 18 volts of power.That means plenty of torque and more time between charges.  It's compact design let's you get into those hard to reach places.  It has a built in LED light and comes with a charger and 2 battery packs.  I really like this one and I think you will too.  It is a lot of drill for the money.  Amazon gives it 4.5 stars out of 5.  I give it 5.  I heartily recommend it.  Click Here for more customer reviews and details.  Rory

Greentiques Superstore Opening

I am trying something new over here at The Greentiques Solution.  I am opening a Superstore for people who visit my blog.  It is powered by Amazon but will not include everything that Amazon carries.  Instead it will focus on a few niche areas such as Craft Items, Books, Power Tools and Hardware, and things that Greentique readers might have an interest in.  Right now it is still under construction, but it should be fun once I get it all together.  To visit it you can just CLICK HERE or click on the big banner on The Greentiques Solution site . Hope you enjoy this new feature.  Bear with us while it improves daily.  Rory

Tuesday, April 20, 2010

6th Published Photo Game

Donatella tagged me to be a part of a photo game.  To play the game you need to reach back into your archives and republish your 6th ever photo and explain how you might upate it or change it today.  My problem is that The Greentiques Solution is still only a couple of months old, so I am afraid I won't be reaching back very far, but here goes.  My 6th photo was part of a tutorial about how to refinish a table.


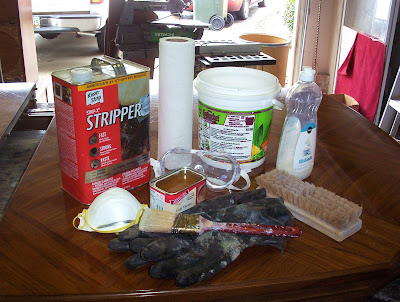
The post was entitiled How To Refinish A Table -Part 2- Stripping The Finish .  I am not sure I would change how I did this project, because my methods of refinishing have not changed since I posted this pic. However, I would probably change the way that I wrote the actual text.  In looking at this pic I now see potential links to products that I used back then.  I also could have done critiques on those products, or maybe even placed them in my online store so that readers could buy the exact same products that I use.  Right now, the store's inventory is limited to books, but I may have missed an opportunity to expand a little in looking at this picture.  I find myself learning more everyday, and each time I write something new.  Thank you to all of you who have stuck with me, as I make my way up the learning curve.  Rory

Now I guess I am supposed to tag 10 more great bloggers to join the game.  Here they are!


Monday, April 19, 2010

New Poll Question At The Greentiques Solution


I have posted a new poll that I hope all of you will take the time to drop by and fill out.  It asks 1 simple question..."What percentage of your craft supplies do you buy online? "  It is located on the sidebar.  If any of you wish to comment further on the kinds of things you buy, please go right ahead.  I value your input.  Thanks, Rory

The Romantic Welsh Love Spoon


Here is the romantic old story of the Welsh Love Spoon...
In the 1500s, during their long voyages at sea, longing for affection,  Welsh sailors would carve spoons for their intended sweethearts.  Most of the sailors could not read or write in those days, so they carved what they wanted to say, in the form of a spoon.  Each symbol that they carved had a special meaning.  A cross for faith, a heart for love, leaves for a growing family, an anchor for the sea, intertwining ropes for their life together, a flower for rememberance and lots more.  Hence the phrase "spooning". 
The pictures here are spoons that I have carved myself.  Some I carve purely for decoration like the fancy, more traditional spoon, in the center.  Others I carve so that they can actually be used in the kitchen.  I use various wood including mohogany, walnut, and basswood. I create my own original designs on graph paper and carve each one by hand. It takes several hours to do the actual carving.  It then takes even more time to sand it smooth and do the final hand shaping of the bowl.  It is a pretty labor intense project to carve a spoon in this fashion.  It really makes a person appreciate what a sailor went through to make a spoon at sea, with little more than a pocket knife.  Sandpaper in those days was probably made from sharkskin. 

I sometimes sell a few of these on Etsy, or at the antique shows.  There are a couple spoons on my sidebar that you can click on to go see some more, and maybe purchase one, if you like.  I think they would make a teriffic Mother's Day gift. 
I hope you were all as thrilled hearing this historic bit of romanticism as I was for the first time.  I plan on doing a tutorial on Welsh spoon carving soon, so check back, if you are interested in tackling one of these yourself. 
Keep up the good work.


Rory

Sunday, April 18, 2010

My Latest Trash Can Find – Noah’s Ark

I could not help myself with this one.  I just had to load it up! 

000_0808
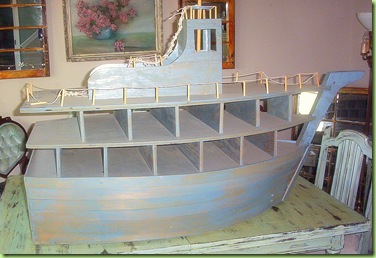
I was donating some of my time to a local guild yesterday that specializes in doing woodwork for charity.  It is an amazing organization that does things like build wheel chair ramps for people who are in need. This great group of people needed volunteers to move their facility into a new location.  I am a member, so I naturally volunteered  to help out.  It was a long day of demolition and cleanup to get the building ready for use.  Amongst the huge pile of stuff being thrown away was this handmade rendition of Noah’s Ark.  Nobody claimed it by the end of the day, so I threw into the back of the truck.

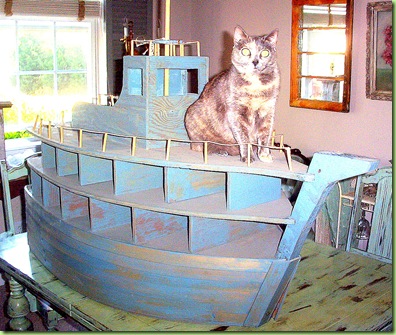
Our cat, Paris, really likes it!

000_0811

I think it is just crude enough and weathered enough to be pretty cute.  I imagine it in a beach house, to store rolled up beach towels.  Or how about in a boy’s room to store his shoes?  It needs a little work to get in shape, but nothing major.  I would be interested in hearing other ideas, as well.  Let me know.  Rory

Wednesday, April 14, 2010

Restoring Outdoor Furniture Tutorial Video

Wipe On Furniture Finish-Make It Yourself.

When I need to apply a quick finish that can be wiped on, I make my own.  It has decent durability, requires little or no sanding between coats, and is dry to the touch in 20 minutes or so.  Here is the formula...


1 Part Fast Dry Polyurethane


1 Part Boiled Linseed Oil  (It will say "boiled" on the can when you buy it.  Do not attempt to boil linseed oil on you own!)


1 Part Mineral Spirits


Mix all 3 parts together in a can and shake a minute or so until well mixed.  The mixture will foam a little bit and bubbles will be present, but this is not a problem.


This finish is now ready to apply.  It goes on kinda like a tung oil.  Just wipe it on with a paper towel.  Wait 15-20 minutes and wipe off excess finish.  Apply a second coat right away if you want.  More coats may take a litle longer to dry.  Finish cures completely in about 24 hours.  That's all there is to the application.  Pretty easy. 


I do not use this finish on things that will require a ton of durability like tabletops.  I also do not use it on things that require thick coats.  But, it is great for small projects that you don't want to get out your brush for.  I was using it on one of my hand carved cooking spoons the other day and it was teriffic. 


Tip:  This finish works a lot better if your project is VERY well sanded before you apply it.  On my recent walnut spoon project I sanded it down to 400 grit and it was pretty nice.  You can go with even finer grits and get even better results with this finish. 

I recommend trying it out on some well sanded scrap before you use it on a project, so you can get a feel for it.  Let me know how it goes.


Rory

Tuesday, April 13, 2010

Guest Post Swap?

If any of you bloggers out there are interested in doing a guest post swap, let me know.   I would like to schedule a few over the upcoming month.  Thanks.  Also, be sure to link up to the party.  It is still going on and I would love to have all of you join in.


Rory

Link Party Project Of The Day From Primitive and Proper

The link party is still going on so stop by and join all of us.  Today's featured link up blogger is Cassie from Primitive and Proper .  That's her in the green with the great smile.  She loves to decorate and likes to mix vintage with modern. 


This is the fun chippy shutter table she made and posted on the link party. 


She also apparently is a baseball fan.  Here is a picture of one of her favorite Cub players.


2 things you need to do today.  1st thing, while you are here, please join the link party.  I love to write feature posts on bloggers that party.  Maybe your blog will be the next one I write about.  2nd thing...go see Cassie at Primitive and Proper , of course.


Rory

Sunday, April 11, 2010

Featured Blogs From The Link Party


My very first link party is underway and we already have a few people linking up.  Lee Ann from the French Maids Place decided to show off her hand stamped ribbon this time.  It's pretty creative stuff.  Her blog is still very new, but I think it is going to be pretty fabulous.  Be sure to say hello to London, her rhinstone collared cat. Here is her link.


Rita from Curbside Creations sent in this china cabinet makeover project she recently finished.  The before and after pictures are on her blog.  Her specialty is dragging home things that nobody else seems to want, and creating something beautiful with them again.  She does great work.  Give her a visit.


By now, I think all of you know what a nut I am about repurposing and recycling.  One of our new followers specializes in sign making and hand painted furniture.  Her blog is called Signs of Obsession.


Christina does most of her signs from recycled and repurposed materials.  She shows the step by step sequence of the making of this one on her blog.  It is a post worth checking out.  If you have ever attempted signmaking, you will appreciate how great her work is.  Tell her that The Greentiques Solution sent you.


The link party is still going on. Show me your best stuff.

Rory

Saturday, April 10, 2010

The Greentiques Solution 1st Link Party!

I have been wanting to do a link party for a while now, so here we go! I am a glutton for punishment so  we will be partying for a full week.  (Reminds me of younger days.)  Here are the rules.  Link your best projects (up to 4).  No duplicates please.  Use you post URL to link with. Not your blog URL. 

It is not required but I would appreciate anything you can do to help promote this link party.  Put The Greentiques Solution on your sidebar or put the party in a post or just plain pass the word along.

In return, I will be doing daily feature posts on some of my favorites to help promote some of your blogs out there.  I can't wait to see how this goes!  Have fun!

Rory

Link Party!

Friday, April 9, 2010

Rory's Book Of The Week-The Caners Handbook

For those of you who want to try something new, you might want to give chair caning or rush seat weaving a shot.  There are alot of deals at garage sales and flea markets on old chairs that need new seats.  Repairing these old chairs has become somewhat of a lost art.  I get calls all the time from people who need them done. 


Whenever I have an issue with a seat that I have not run into before, this is the book I turn to.  I highly recommend it.  It is called The Caners Handbook and it is written by Bruce W. Miller and Jim Widess.  It has great pictures and step by step instructions.  There are also chapters on wicker repair, split oak, pressed cane and swedish cord.  It is a wealth of information if you are going to do seat repairs.

It is available in The Greentiques Solution Bookstore, or just click on Rory's Book Of The Week, located on the sidebar.


Repairing these old chairs is a great way to keep them out of landfills and make some money at the same time.  Give it a try!


Rory

Introducing Donatella Style and DustyLu-2 Fun Blogging Sisters


This post is about 2 fabulous sisters that are wayyy fun.  Everytime I visit one of their blogs I picture these 2 charachters laughing and enjoying each others company as they search through antique shops and second-hand stores.  They truely seem to have a great time together. 
The first sister is Donna.  She lives in southern California now, but was originally born in Italy.  That is her picture on the right, with the flower in her hair.  She writes a blog called Donatella Style.   It is about Home Decor, Recipes, and Family Living.  Her recent post about garden beauty and bringing a little bit of "indoors", "outdoors",  is one you should read.  Here is her link.    http://donatellastyle.blogspot.com/  

 The second sister is Lu.  She is in the picture on the left with her family.  Looks like it was a pretty fun dinner by looking at them.  Lu's blog is called DustyLu.  I love the clean fresh look of it and her great eye for photography.  Her passions are Decorating, Styling, and Cooking.  Her current post showing a recipe for fresh red bell peppers is nothing short of mouth watering.  Give her a visit.  Her is her link.  http://dustyluinteriors.blogspot.com/


Donna and Lu are 2 of those special kinds of bloggers that make you feel like one of the family.  They are a pleasure to be around.  I love this old pic of their mother in Italy, from 1958.


Isn't she fabulous?  I could not resist posting it.  Makes me want to buy a plane ticket back in time, to Italy.


Make sure you visit Donna and Lu.  They are the kinds of bloggers that will become your friends.


Rory

Thursday, April 8, 2010

Rory's Tip of The Week-Lead Based Paint

Many homes built in America prior to 1978 were painted with lead-based paint.  This may include window casements and shutters.  If you are planning on using old window frames for your next prim project, here is a little advice.


Keep sanding to a mininum and wear a protective mask.  The dust is hazardous if breathed in by nose or mouth.


All loose paint chips must be removed.  Small children are especially suceptible to health risks from swallowing lead-based paint chips.


Handling items coated with lead-based paint and then putting your hands near or in your mouth is a concern. 


Whenever I repurpose old window shutters of frames like the ones pictured, I apply a coat of polyurethane or shellac over it, so that there is no lead based paint exposed.  This also solves nearly all of the problems associated with lead-based paint chips falling off onto the floor after it is hung.


Hazards of coming into contact with lead-based paints include, high blood pressure, headaches, nausea, brain damage, and slow growth in children.  Most homes built before 1978 contain it.  Many of us still live in older homes, so there are specific ways to deal with it, according to the United States Evironmental Protection Agency. 


Here is their link for more information.

http://www.epa.gov/lead/pubs/leadinfo.htm#buy


Please be careful when you suspect that something you are working with is a canidate for lead-based-paint, such as architectural moldings, banister railings and posts, old fencing, metal ceiling tiles, etc. 


Keep up the good work.


Rory


Rory's Editorial Post of The Week - The Gloom and Doom Impact

Everywhere I go I seem to be surrounded by negativity these days.  I heard and saw a great deal of it at the antique show in Charlotte last weekend.  I have also seen it at the Scott's show in Atlanta, and in every antique mall that I wander into these days.  Negativity about the economy, republicans,  democrats,  the weather, the cost of gasoline, health care, and you name it.  I think that our worst problems are not about any of these things.  I instead think that many of America's problems are due to our own " gloom and doom " mentality. 

Let me give you an example.


About 3 months ago, Lee Ann and I signed up to be vendors at the Charlotte ICA antique show.  The first day of the show there was an ice storm.  Lee Ann and I spent the entire first day of the show sitting in our booth waiting for customers that never arrived.  This is how we make our living, so it was pretty disheartening to have counted on a little income, and then have an uncontrollable event happen, like an ice storm, on the very first day. 
The second day we were hoping for good weather.  We thought we could pull out a decent amount of sales if the sun were to show it's face.  Lee Ann and I got up early and turned on the local weather channel.  Here is what the weatherman said.... " If you don't have a reason to go somewhere, it is better if you just don't go. "  And guess what happened.  Even though the weather improved a great deal, people stayed home. 

The weatherman could have easily put a little bit of a positive spin on things, but he chose not to.  As a result,  his negativity had a destructive impact on the economic welfare of several hundred vendors that were at the show that month.  One gloom and doom comment, by only one weatherman, is all that it took.


We get that same gloom and doom negativity all over the place.   You cannot turn on the tv without being bombarded by it.  Even though our economic recovery is dependent on consumer confidence, I keep seeing Americans dwelling on negatives instead of positives. 


I know it is diffcult to have a positive attitude about things during economic rough spots, but here are a few things to remember that may help.......


1. Sales are the backbone of the economy and a negative attitude never helped a salesman sell anything.


2. Most of us have very small problems in the grand scheme of things.  I personally did several million dollars better than General Motors the first quarter of 2010.  If you made any money at all, you could also say the same thing.


3. Stay way far away from the negative traps that the media sets for you.  Negativity sells more newspapers, so why print anything positive?


4. Beware of politicians who predict doom amd gloom.   Politicians know that predicting disastrous consequences if you don't vote a certain way, will probably get them on tv.  Be especially wary if they are coming up for re-election soon. 


5. As a former business manager, I had a strict rule where my employees were concerned.  I told them that they were welcome to give constructive criticism, but they were never to complain.  The difference between the two is that complaining is negative, and constructive criticism is positive.  Constructive criticism is usually coupled with a solution to the problem, where complaining has no real value. 


6. Some of the most successful people in the world got that way because they surrounded themselves with the right kind of people.  Successful people want to be around postive thinkers and problem solvers.  


 7. Make a committment to yourself that excuses and complaints don't wash anymore.  Excuses and complaints won't help your items sell on Etsy.  Instead, evaluate your situation and become your own problem solver.


Most of all, keep up the good work and stay positive.  If you can get  through these tough economic times,  you will have it made when the recovery takes hold. 


The next antique show I attend I think I will go around asking vendors a couple of simple questions like, What is working for you?  instead of,  How is it going?  By the way, I would love it if a few of you out there would post what kinds of things are working for you.  Let's hear a few success stories.


Rory

Sunday, April 4, 2010

Happy Easter From The Charlotte ICA Show


Wishing you all a very happy Easter from Rory and Lee Ann, at the Charlotte ICA Show.

Friday, April 2, 2010

How To Make A Vintage Jewelery Cabinet-Before and After Photos

In case you don't remember what this old cabinet looked like, here is the before picture.


I reglued just about everything on it. 

It was pretty much a disaster.


But, once it was glued and the veneer was stabilized, it was all downhill from there.


I wanted it to have some "bling", and be really "over the top", so I started with a base coat of silver. I applied it with a spray can.  I did this to the entire exterior of the cabinet.


I then painted the cabinet white with a brush-on flat interior latex paint.  I used a very dry brush, letting the silver show through quite a bit.


The interior was lined with cedar, so I just sanded it clean.  I also added a shelf, which I painted to match the exterior.  I painted the hardware silver, then rubbed it with a papertowel while the paint was still wet.  This gave the hardware a sort of dull pewter look.


When the coat of white was dry I added some white glaze to bring out a little aged looking gray coloring.  The glaze softened the silver.


I then used some brush on siver gilding paint to add a little "pop" to the molded edges of the doors and trim.  I used a fairly dry artist's brush to do this.  I wanted to give it the effect of very worn silver gilding on the edges of the cabinet to "frame" everything in.  Above is the finished result with doors closed.


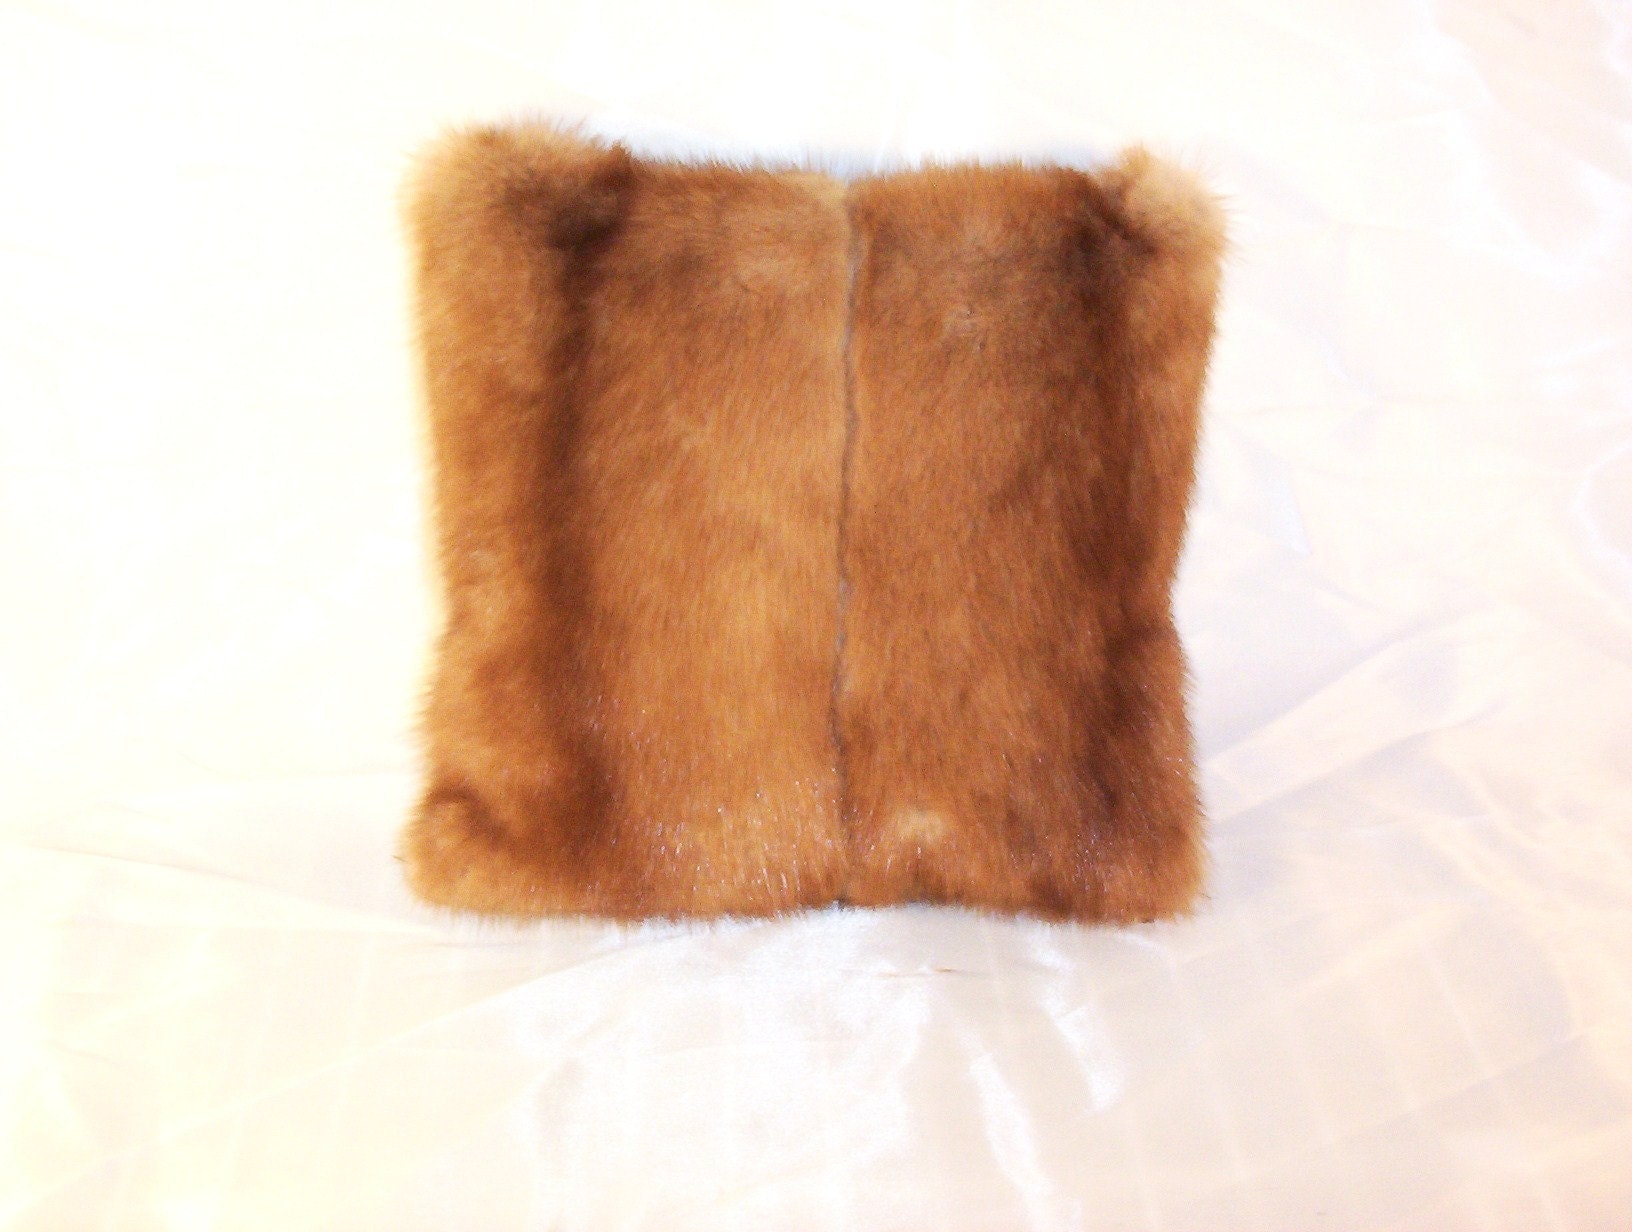
Here is the finished product with the doors open as Lee Ann and I displayed it at the Charlotte ICA show.  We did not have time to line it with satin like we wanted to, but I think displaying it with mink and fox pillows (made from repurposed vintage fur coats) tended to soften the hard surfaces and give this old armoir a rather luxurious and indulgent look.  What do you think?


Rory

And The Winner Of The March Oven Key Giveaway Is......

Cat Nap Inn Prinitives!  Congratulations Cat.  you are the winner of my handmade victorian oven rack key.  Thank you for commenting on The Greentiques Solution and entering the contest.  I will be sending you your oven key as soon as I get back from the ICA show.

Fot those of you who have never visited Cat Nap Inn Primitives, you need to take a look.  She is a long time crafter, junker, interior designer and oh yeah, cat lover! She has a very fun blog. Here is her link  http://catnapinnprimitives.blogspot.com/  

Thursday, April 1, 2010

Easter Egg Shortage-Ut Oh


It's about 6:30 am here in Charlotte, and today is the first official day of the ICA Show.  Yesterday was a setup day for most vendors.  Lee Ann and I came down a day early and most of the work was done, so we spent most of yesterday greeting some of the early buyers that showed up. 

I wish I had more Easter eggs.  I had no idea they would be such a hot item.  I am nearly sold out, and the show has not officially opened to the general public yet.  It was a little bit of a egg feeding frenzy yesterday.
Lee Ann and I talked over dinner last night and decided that next year I will need to make several hundred of these little guys. 


We are "eggspecting" a huge crowd today, so I better sign off and get going.  I will post more later tonight and promise some fun  pictures.


Rory

Wednesday, March 31, 2010

The $32,000.00 Hat Rack


Yep!, That's right!  You can buy this combination hat rack and umbrella stand for only $32k.  Just one of the many fine pieces of furniture at the ICA show in Charlotte today.  I really loved this one.  It was made by special comission.  It is one of a kind and was handmade in America in the tradition of Black Forest pieces being made in Europe during the 1850s.  The immense elk antlers are real.  Each antler tip is capped with a carved wooden acorn.  The elk head is hand carved from wood.  The whole thing is over 7ft high.  It is a genuine showstopper.  Thought you all might want to see what a $32,000.00 hat rack looked like.

Rory

Tuesday, March 30, 2010

We Made It To The ICA Antique Show!

Well, it's almost 8pm and I am at the hotel.  Wow, a reallly long couple of days.  Lee Ann and I spent yesterday preparing last minute items for the show.  I managed to put together a couple of chalkboards made from antique picture frames.  I also did the faux finish on the vintage jewelery cabinet, that I am posting a tutorial on.   We did not get a chance to upholster it, but it seemed too nice not to bring it.  I will be posting pictures of it tomorrow. Tomorrow should be an interesting day.  This particular show features an early buyer viewing option.  Buyers can, for an elevated ticket price,  come to the show a day earlier than the general admission public to scope out the show.  We do not expect a ton of customer traffic tomorrow, but the word is that the ones that do show up are often serious buyers, who are there for a reason.  Many times these customers include interior deigners and their clients, who are armed with color swatches, fabric samples, and checkbooks. 


We finally finished loading the 2 trucks last night around 11pm.  Then we were up at 4:30am to throw our luggage and computer in with us and head off  to Charlotte!

We started unloading about 10am.  After working all day long trying to set up, we are still not completely done, but close enough to earn dinner at Denny's. 


There are a lot of stories, or maybe urban legends about clients spending obscene amounts of money at these shows.  I heard one such story a few months ago in Atlanta.  It was about a woman who walked into the show on the very last day with her interior designer and checkbook in hand.  Many of the antique dealers who were showing there had already packed up their trucks to go home.  This woman ended up spending roughly $40,000.00 in about 30 minutes from the dealers who decided to stick around the last few hours of the show.  You just never know what is going to happen.  Tomorrow could easily be a day like that.  Personally I would be tickled if I sold a few picture frames, and maybe a chalkboard.  I will let you all know tomorrow night how it went and will post some pictures.
Time to get some rest.


 Rory

Monday, March 29, 2010

The Greentiques Solution Update

First of all I really need to thank everyone who has visited The Greentiques Solution lately.  Considering that my little blog is barely a month old, it has been really exciting for me to see so many visitors, comments, followers and contest entries.  Your support has been amazing.  Thank you.

Next, Classy Chassy won the Earth Hour Giveaway.  For those of you that entered and didn't win, don't depsair because your comment also automatically entered you in my March Oven Key Giveaway.  So you still have a chance.  By the way,  Classy Chassy has a great blog of her own called Expressly Corgi.  Stop by and visit her.  Here is the addy.  http://corgi-express.blogspot.com/ 


Also, today I am preparing for the Spring Classic ICA Show.  Lee Ann and I will be setting up a booth there in the big circus tent.  The show goes from March 31-April 4.  I will be attempting to post from this great antique and collectibles extravaganza.  This will be a fun one.  I plan on taking lots of pictures so stop by periodically and take a look.


Keep up the good work!

Rory

And The Winner Of The Earth Hour Giveaway Is.......

Classy Chassy!  Here is her contest winning comment on her Earth Hour plans.

"I found your blog at Cozy Little House - and joined as a follower. Love your ideas for repurposing, and I do that myself quite a bit!


Of course I would like to enter your contest, and for the Earth Hour Event, Mr. Wonderful and I will be having a quiet dinner alone, candles lit, our hand-crank radio playing soft romantic music from a classical radio station as we share some home made dessert wine we received as a gift from my brother in law! Can hardly wait! We celebrated our 7th wedding anniversary on the 22nd, and it's been a wonderful romance all week long! "


Classy will be receiving one of my handmade fleur di lis oven keys in the mail.  All she has to do now is tell me what kind of wood she prefers and where to send it. I will make one custom for her to go with the cabinets in her kitchen.  Now she will be able to pull out her hot oven rack with this fun key, instead of searching for potholders.
Congratulations Classy Chassy and thank you for entering!

Rory


Sunday, March 28, 2010

Meet My Friend - Cozy Little House


This post is about one of my recently found blogs, Cozy Little House.  I am not sure how we happened upon each other, but I am really glad we did.  This is truely a very kind and talented lady, with a love for flowers, poetry, quilting, photography and her beloved pets.


Her dogs names are Charlie and Abi, and these are a couple of real cuties.  Poor Charlie though has not been feeling well lately, so you might want to send him a little Get Well Soon coment.


I love the photography in this blog!  She has quite the eye for it.  Her nature shots are stunning.  Her blog gives you the feel of Easter and Springtime.  It is clean, uncluttered, and a piece pf little eye candy.  Please take the time to stop by and enjoy Cozy Little House. 
 
Here is the link.

http://cozylittlehouse.blogspot.com/


Rory


Saturday, March 27, 2010

Tonight Is Earth Hour-Be Sure To Enter The Giveaway!

Some of you may have missed my post about my  Earth Hour Giveaway Contest. It is a great excuse to serve your dinner by candlelight tonight, or do something special for yourself.  Fun stuff!  Earth Hour 2010 is tonight at 8:30, so you need to enter soon.

Click on this post link for contest details.  Entering is really, really easy.

http://thegreentiquessolution.blogspot.com/2010/03/earth-hour-party-plans-giveaway-contest.html

Good luck in the contest and have a great time tonight.
Rory

How To Refinish a Table - Part 5 - The First Clear Coat


Part 4 was about applying stain.  Today we will finally do a clear coat, but it may not be the kind of clear coat you were thinking of.  The first coat on this table will be a spray coat of clear shellac.  Here's why...Silicone based waxes have become quite popular in recent years and contamination from silicone can cause havoc in a finish.  I posted a little bit about this very subject in my "Tip of the Week".  I am not going to take any chances of having blemishes in the finish from silicone contamination.  I have found that the easiest way to avoid problems is just to go ahead and spray a coat or 2 of shellac on the table before I apply my polyurethane.  The shellac will act as a barrier between the silicone and the poly.

Before I apply the shellac, I need to do some last minute prep work.  I need to make sure the stain is absolutely even.  Color has to be consistent.  No blotches.  No sticky spots.  No dust. It must be completely dry.  To be honest, I am never completely satisfied at this point, so I have learned a little trick. 


I simply wipe the surface down with a paper towel, dampened with mineral spirits.  Doing this may lighten the stain slightly, but I gladly trade the little bit of color for the benefits of doing this.  It will give me absoloutely even color and eliminate most of any dust that has accumulated while the stain was drying.

  This table had the original "speckled" stain that was so common for a while.  It had little tiny black paint specks underneath the clear coat.  The owner of the table wanted me to duplicate it. So I need to add some specks before the shellac goes on.  It is pretty easy. I just use a very small amount of black acryilic paint, a little water, and a small, stiff, artists brush.  I mix the water and the paint to make it a little soupy.  Then I dip the brush in the paint, and pull back the bristles with my thumb and release them to create sort of a misty spray.  It seems to work better if I hold the brush up fairly high and don't load the brush with too much paint.  Take your time and get your specks consitsent across the entire table.  Then let it dry completely.


Now it is time to spray the shellac.


I use the spray version because I don't want to disturb any silicone.  I just want to spray over the top of it, and seal it off from future coats.


Use nice even long strokes. Make sure the surface is covered completely.


Here is a little trick to avoid having to tape off edges.


I didn't want to get any shellac on the table skirt, so I held a piece of hardboard, just under the top to block the spray.  Any thin piece of wood or stiff cardboard will work.  It was a real time saver on this project.


When you are done spraying it should look like this.  Can you see some of my applied paint specks?
That's about all there is to applying shellac.  It dries fairly quickly.  If I want to apply a second coat I could do it right over the top of this coat within a couple of hours.  But before I apply polyurethane I will let the shellac cure completely, overnight.

We are closing in on finishing this project.  Next will be about applying polyurethane.  Poly can be a little tricky, so don't miss this next step.

Rory